


TruthVine websites include the ability to manage a private exclusively for the use of your church members, including files which are only available for church members to download.
If you are a new customer, we will ask during the setup process if you would like a Members Area. Existing customers are welcome to contact us to have a Members Area added to their website.
Following are some instructions on how to manage the Members Area of your site.
Users and Roles
For the system to work, each user has to been assigned to appropriate Roles in WordPress depending on what they should be allowed to access. TruthVine will set up a “Member” role for you. You’re free to create or modify these as you wish: Go to Users -> User Role Editor.
You create new user accounts in the Users page, pressing the Add New button at the top. When creating them, you can set the Role to Member, or whatever you like. You can also change this afterwards in the User list by clicking the checkmark next to their name, then selecting the role in the “Change Role to” dropdown and clicking Change.
Members Only Pages
To create a restricted post/page, you create and edit a page as normal. Then you need to look for the Restricted Roles section on the right hand side of the editor:
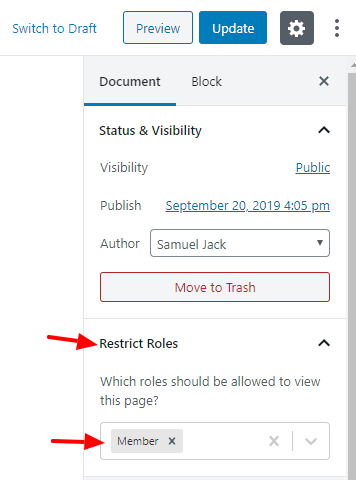
In the dropdown you choose which Roles should be allowed to access the page. Then you click Update. Any user accessing the page who hasn’t been assigned one of the allowed roles will see a message telling them they’re not permitted to access the page.
Private Files
In general, any files that you upload to WordPress in the usual way are available for anyone on the internet to download. If you have files that you want to limit to members only, you need to do the following:
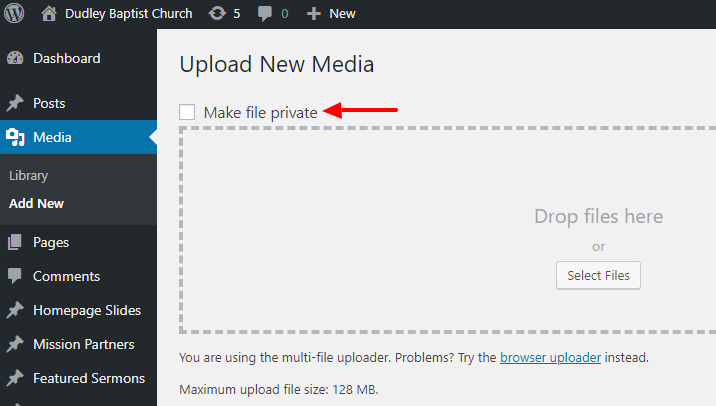
- Go to Media->Add New.
- Make sure to check the Make file private checkbox.
- Then drag and drop files into the indicated zone, or click the Select Files button to choose them through the standard file explorer.
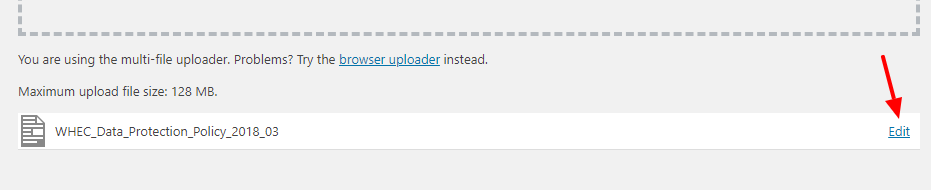
- Once the file has finished loading, click the Edit button to the right of its name:
- On the Edit Media page for the file, locate the Access Security panel, and check the boxes for the Roles who are allowed to download the file.
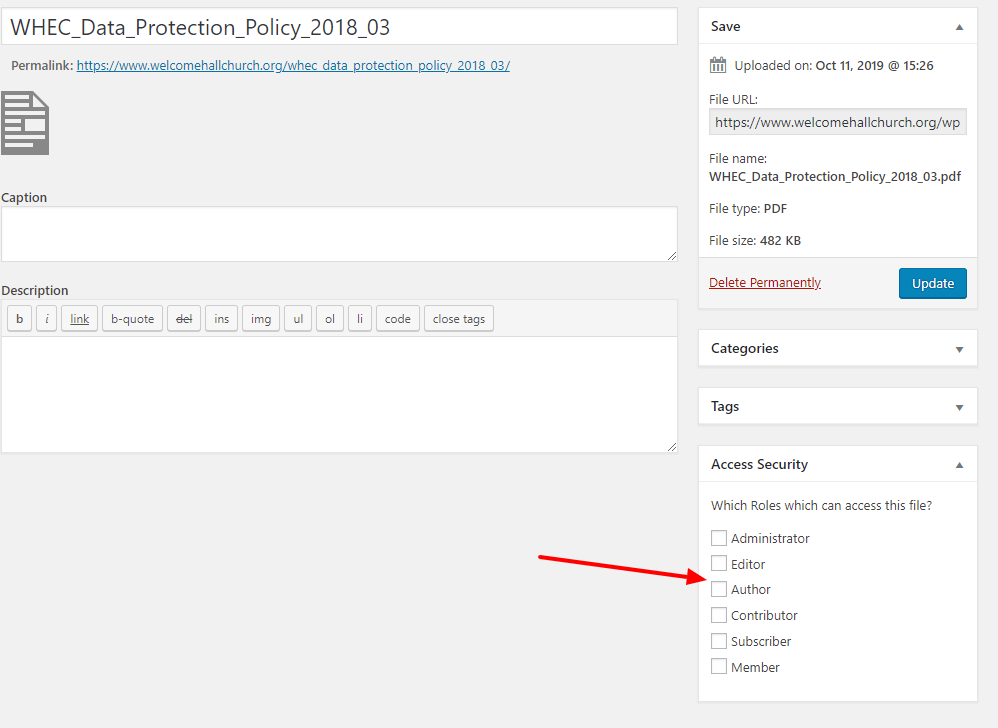
- Press Update to save the permission changes.
If you can’t see, or don’t check, the Make file private check box when uploading, the file will be available to everybody! At present there isn’t a way of make a file private once it has been uploaded. You’d have to delete it permanently from WordPress then upload it again.
Changing file permissions
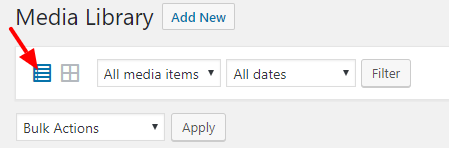
- It is possible to change who can access a private file after it has been uploaded. To do this, go to Media > Library, and make sure that the library list is in Details mode by clicking the bulleted list icon at the top left hand side:
- Locate the file that you want to change, hover over it, then click its Edit button. This will reveal the Access Security panel as shown in the previous section.
- Make any changes you need, then press Update.